If you own a 2007-2014 Chevy Tahoe Police Pursuit Vehicle (PPV), chances are you got it at a competitive price with a reliable service record. However, you might notice it differs from a standard Chevy Tahoe, such as having an empty space where a center console usually sits.
In this blog post, we'll walk you through how to fill that empty space with a GM OEM center console or an OEM jump seat. Whether you're looking to upgrade your Tahoe PPV or a personal GM Truck or SUV, this guide is for you.
OEM Center Console - Tahoe, Yukon, or High Trim Level Pickup Truck
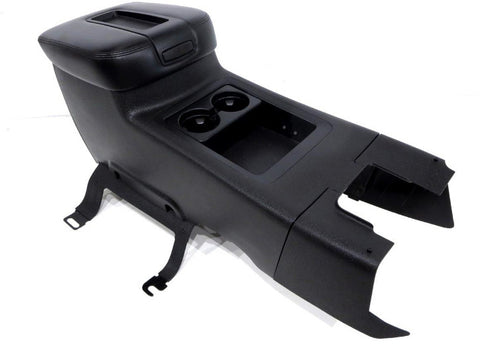
An OEM center console offers additional storage and comfort for your Tahoe PPV, GM Truck, or SUV. It includes features like cup holders, armrests, and compartments for personal items, all while seamlessly matching your vehicle's interior.
OEM Jump Seat
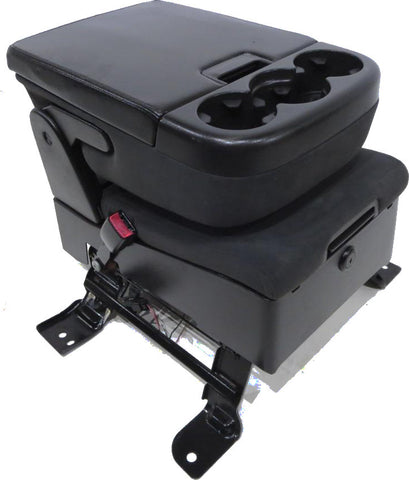
If you prefer adding an extra seat, an OEM jump seat is a viable alternative. It folds down to act as a console or folds up to serve as an additional seat. Equipped with a cup holder and under-seat storage, it also harmonizes with your interior's style and color.
What You Will Need
Before commencing your project, ensure you have the following:
- An OEM GM console or jump seat
- A set of E-sockets and Metric sockets for bolt removal
- A ratchet or impact gun
- A wire cutter or soldering tool for any electrical connections
Installation Steps
Follow these steps to replace your existing console or jump seat:
- Slide the seats all the way back and remove the two bolts at the front of each seat. Remove the plastic caps covering these bolts.
- Slide the seats all the way forward and remove the rear bolts.
- Lean the seats forward and disconnect the wiring harness.
- Remove or slide the seats back, laying them on the folded rear seat.
- Place your new console or jump seat and align it with the floorboard holes.
- Reconnect the wiring harness.
- Hand-tighten the rear bolts, leaving some slack.
- Move the seats back and insert and tighten the front bolts.
- Finally, tighten the rear bolts.
Congratulations, you have successfully installed a new console or jump seat. Enjoy your upgraded comfort and convenience!
Tips and Notes
Keep the following in mind during your upgrade:
- If opting for a jump seat, make sure it includes a full seatbelt assembly.
- The Silverado "LT2" console will not function for the Tahoe.
- For any questions or to find the ideal console or jump seat, Contact Us or email support@oemcarandtruckseats.com.